Have you ever made spaghetti squash in the hopes of noodles…& ended up with mush? We have. Quite a few times actually. The faux noodles would merge with the sauce & become squash clumps. They definitely weren’t fooling anyone into thinking they were pasta! So what is the trick? It is all in the cut- keep reading to check it out!…
Summertime Popsicles with the Best K-Cup Flavors #BrewOverIce
This shop has been compensated by Collective Bias, Inc. and its advertiser. All opinions are mine alone. #BrewOverIce #BrewItUp #CollectiveBias

When you think “Keurig” I bet you think of a hot cup of coffee right? Well now they’ve rolled out with Brew Over Ice options- perfect for the whole family! When I went to Walmart the variety was awesome- everything from iced tea to low calorie drinks to iced coffee! My husband actually isn’t a coffee fan & during the summer we don’t reach for hot drinks as much so this really helps us get more bang for our buck with the Keurig we have! In a pinch I started making these great popsicles that are super easy to recreate! Keep reading to check them out & make your own!…
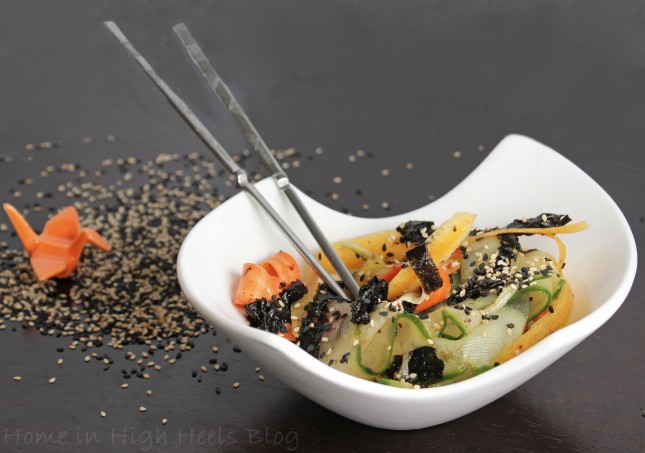
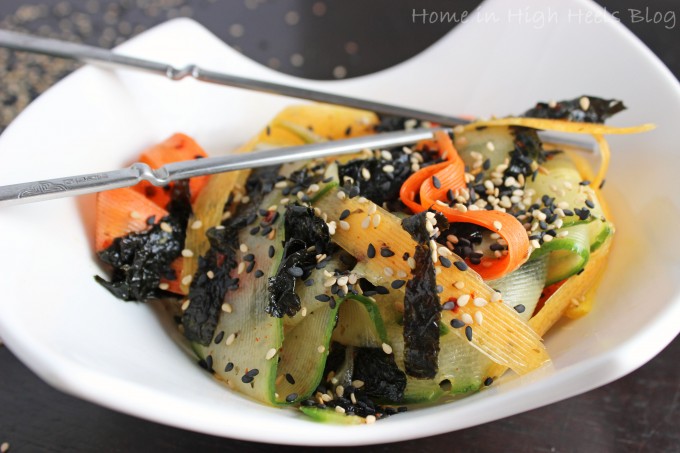
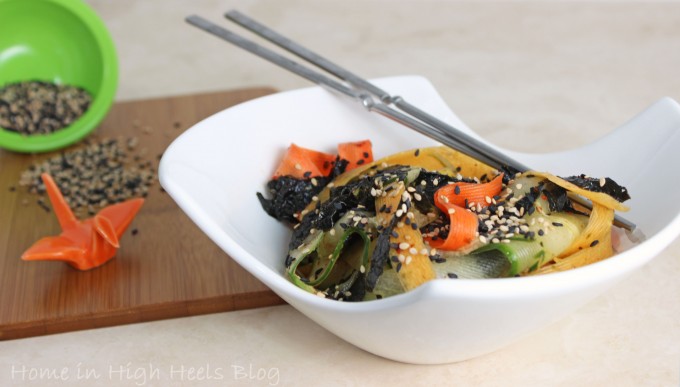
Simple Cucumber Seaweed Salad Recipe
So when it comes to lunches for myself I tend to create something my husband doesn’t normally like. Ryan grew up eating very traditional food & although he’s branched out more than I could have dreamed some meals I love just aren’t his thing- & I really can’t blame him. One of my favorite salads is this quick & easy cucumber seaweed salad which I eat alone or serve with other Asian dishes as either an appetizer or little side salad. Sometimes I even include it in cold dishes (like my peanut noodles or slaws) for a bit of extra oomph.


- 1 large cucumber or 6 small Japanese cucumbers, thinly sliced or cut into matchsticks
- 1-2 large carrots, cut into thin strips
- 5 sheets nori seaweed or seaweed snacks, cut into very thin strips
- For Dressing:
- 2 tablespoons rice vinegar
- 1 tablespoon soy sauce
- 1 teaspoon brown sugar
- 1 teaspoon dark sesame oil
- 1 teaspoon chili flakes (optional)
- 2 teaspoons sesame seeds, toasted (optional)
- Add cucumber, carrots, & nori to a bowl.
- Whisk together sauce.
- Apply sauce & mix lightly with hands or tongs as to not break up or oversoak.
- Serve immediately or chill. Should be served cold.
I really hope you enjoy it! Another great way to incorporate this is into some Asian inspired fish tacos & substitute it as a slaw. So good! Do you have any little Asian inspired healthy dishes to share? I’d love to read about them so feel free to share them below!
Kentucky Derby Inspired Bourbon Peaches & the Cottonelle Great Finish Sweepstakes!
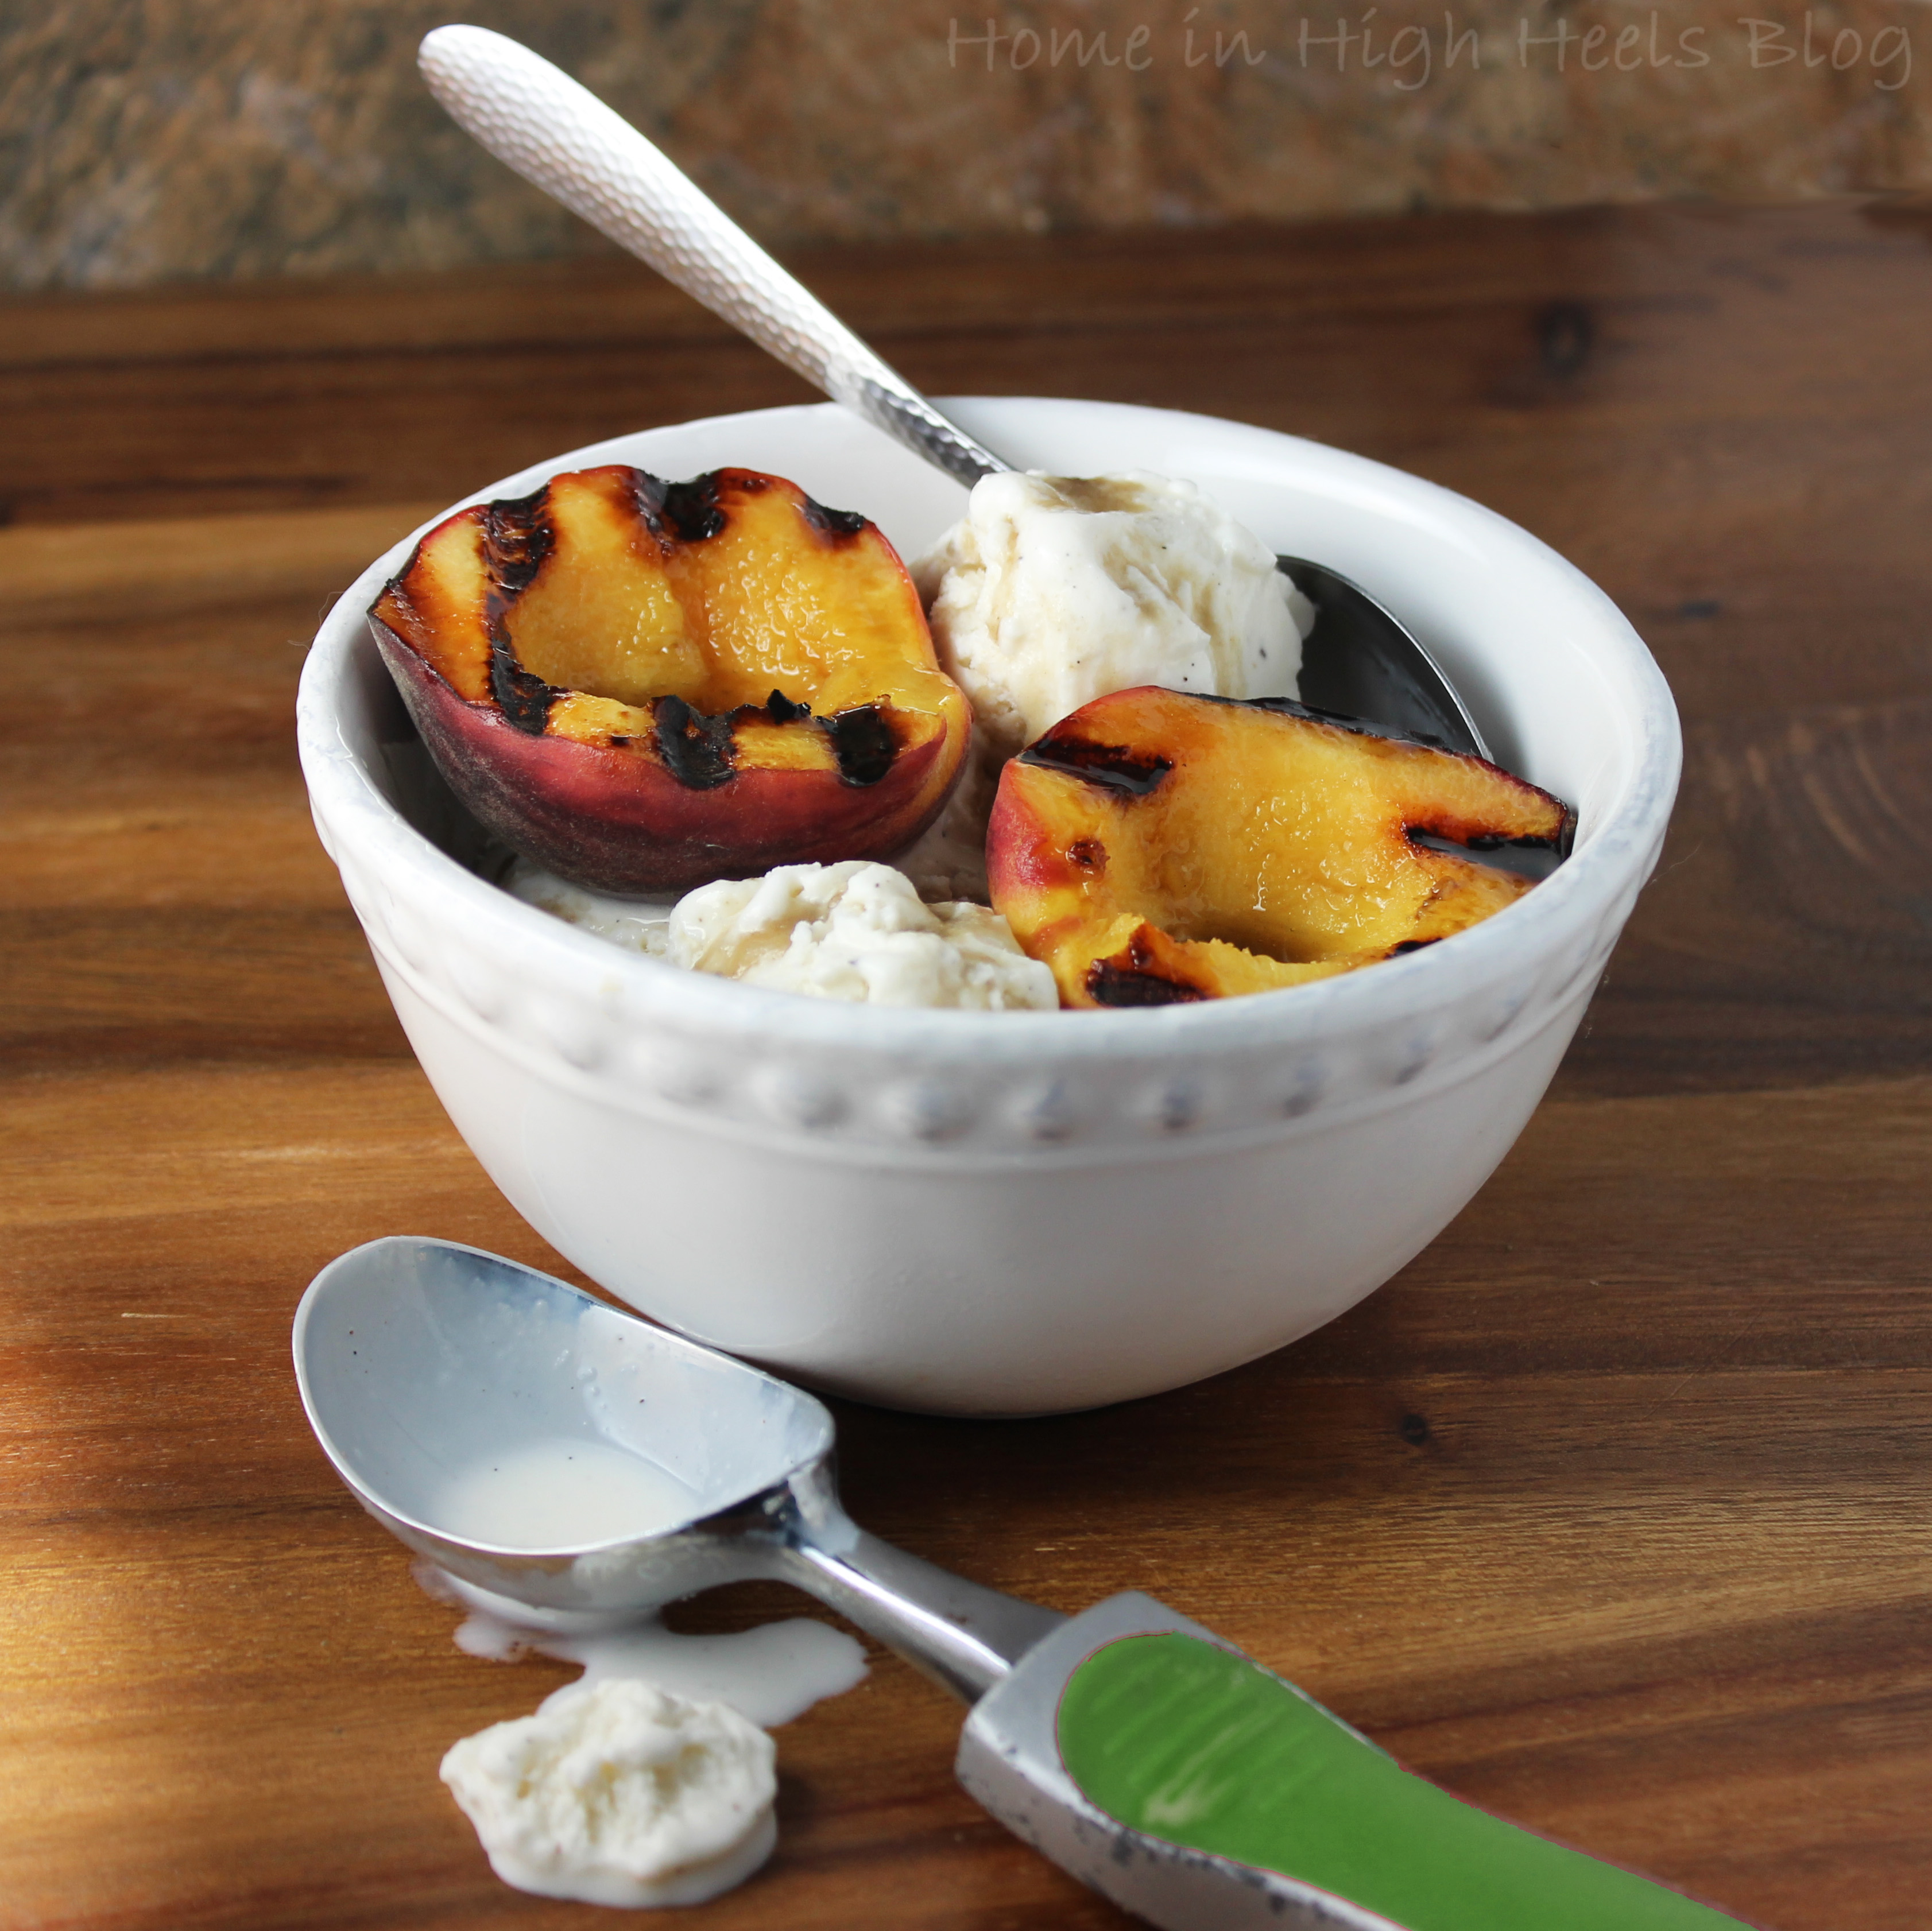
Today I get to share with you a sweet & yummy Kentucky Derby themed treat thanks to Cottonelle who is this years sponsor! When I think of the big day I always dream of big hats, high heels, & fancy drinks. Instead of watching me teeter in heels & get lost in my fabulously big hats (I own so many! I feel like a celebrity in them!) I thought it would be fun to take some of my favorite drink ingredients & turn them into an easy, Kentucky Derby inspired dessert. Enjoy!
- ¼ cup bourbon
- ¼ cup brown sugar (more if you like it sweeter)
- 2 tablespoons unsalted butter
- ½ teaspoon cinnamon or apple pie spice
- ¼ teaspoon ginger
- pinch of salt
- 2 whole peaches cut in half with pits removed
- Combine all ingredients except peaches to a small saucepan. Cook on medium & bring to light boil whisking to combine. Remove from heat & let sit to thicken up.
- Put peaches cut side down on lightly oiled grill or electric grill. Cook until caramelized & you have nice grill marks. Don't check them too often, just let them sit. When you are checking be sure to place them back where they were sitting on the grill or you'll have funky grill marks.
- Place peaches atop vanilla bean ice cream & drizzle with bourbon sauce.
This is one of those recipes that you can prep ahead & it still tastes awesome! Peaches really take very little work to grill & even though they aren’t in season quite yet you can serve the sauce over preserved fruit as well. I love a nice set of char marks- aren’t they lovely? If you’ve ever had people over & not had time to clean up an area (or yourself!) consider whipping out a handy dandy Cottonelle Flushable Cleansing Cloth to do the job! I’ve used them to clean up quickly after brunch, when I just don’t have time to get out an arsenal of cleaning products, or when someone has little ones. My house isn’t an anti-kid zone but that doesn’t mean I need sticky hands all over things! I like to keep my bathrooms well-stocked as well- consider keeping some Cottonelle Clean Care toilet paper rolls in an easy to find spot for guests & a handy Cottonelle Flushable Cleansing Cloth Upright Dispensing Tub to keep your whole house feeling fresh & clean!
So now time for the sweepstakes! You can win a year supply of Cottonelle products depending on the outcome of the races during the Kentucky Derby. Even better news? There will not be just one winner but the first 15,000 entrants to sign up could win Cottonelle toilet paper & flushable cleansing cloths if the outcome aligns!
Win!
1. Visit the Cottonelle landing page.
2. Click on the Cottonelle Great Finish Giveaway
3. Click on “Sign up now”
4. Register for the Cottonelle Updates website
So what makes you feel clean & fresh before a big event? How do you take your bourbon? What will you be doing on Cottonelle Kentucky Derby day?
Bacon Jam Review, Recipe, & Multi-Giveaway! + Spring Blog Hop!
PR Sample.
Do you like bacon? Do you really love it? Then listen up! Today I bring you 4 different types of bacon jam from The Bacon Jams. I am pretty excited to share with you something I probably wouldn’t have ever tried that Ryan & I now love. Whether you have it on some toast, as an ingredient, or as a topper I think you’ll be surprised to find how versatile they can be. As a super special treat there is also a huge blog hop at the base of this post filled with lots of awesome spring giveaways!

So I currently have 3 bacon jams- 3 from the permanent line & a special limited edition flavor. Above is the Original Bacon Jam & behind we have the Black Pepper & Honey, Red Chile & Garlic, & the limited edition Maple Habanero Bacon Jams. Each come sealed in an 8 oz jar with a nice wide mouth- perfectly easy to spoon out what you need without getting too much or too little. I can’t even get over how cute their logo is! A rockin piggy jammin out! Ha!

The first way I tried these jams was on some crusty bread. I mean, hey, isn’t that where you put jam? I liked it that way but the husband didn’t. With some experimenting we discovered he really liked these jams hot (think a hot dip if hot jam isn’t computing!) which doesn’t surprise me either. We tend to prefer our bacon hot (although cold bacon is tasty too!) so then we heated up a little of each & added them to crusty bread. Much better!

From left to right you have The Bacon Jams in Original, Black Pepper & Honey, Maple Habanero, & Red Chile & Garlic. You can see these aren’t gelatinous but rather more of a thick sauce/jam. When heated they thin out considerably because the fats break down. I don’t think there is a right or wrong temperature to eat them- you just have to find your own vibe. You can see each spread on crusty toast is a lot easier to see the differences. The ingredients are wonderfully simple but high in both quality & flavor- you can view them all here on their website.

Now onto the recipe! I wanted to do something ridiculously simple that really showed off a flavor that was dying to be paired with our dinner. I only used three ingredients to make this chicken more fantastic- 3 tablespoons of The Bacon Jam in Black Pepper & Honey, 1 tablespoon fresh honey, & around one tablespoon of water.

After searing your chicken breasts add all three ingredients to the pan. Whisk on med-high until thickened. The added honey helps to make it more of a glaze which will help it stick to the exterior of the cooked chicken. Poor over chicken & serve hot. This should only take maybe 1-2 minutes & the flavor is out of this world!
Needless to say we’re loving these bacon jams. I have so many ideas floating around- Beer cheese soup with bacon jam? BLTs with bacon jam? Bacon jam salad dressings? These are extremely versatile & they are all completely original- something I admire. Think of these jams as creative additions & let your recipes go to the next bacon level with very little effort! Want more ideas? They have a ton of creative recipes on their site here!
They have been so kind to me by letting me try their product & now it is your turn! There will be THREE winners & each winner will get to pick their own flavor variety they’d like to try if chosen! Which Bacon Jam speaks to your bacon loving soul?
While many of us are looking forward to spring, it doesn’t mean we are looking forward to spring cleaning. To make spring cleaning a bit more fun, the MPM Blogging Network has joined together to make spring cleaning even more fun! Each participating blog below is hosting their very own unique spring themed giveaway, including spring cleaning items, fashion accessories, and even gift card for purchasing your own Spring treats! To increase your chances of getting something fun, make sure to visit all the blogs linked below.
Also, don’t forget to enter to win our grand prize, a Shark PRO Steam & Spray Mop!

The Blooming Into Spring Blog Hop ends on 5/1/14 at 11:59 PM. The MPM Blogging Networks is not responsible for prize fulfillment and associated bloggers are responsible for their own giveaways. Good luck everyone and happy spring!
Simple Peanut Noodles with DIY Thai Peanut Sauce Recipe + Noodle Linkup!
Hopefully you caught my Thai Peanut Sauce Recipe yesterday because today we’re throwing it together into one of my favorite lunches! Eat them cold, eat them hot, eat them right after they’ve been prepared, save them for later…main dish…appetizer…side…. Seriously this is one of those dishes that does it all. Plus it is completely customizable. If you don’t dig the veggies I do or you prefer tofu instead of chicken- whatever. Plus it is Friday & that means time for another Friday Foodie Linkup! Check it out!
- For Noodles-
- 1 box of spaghetti noodles
- salt & pepper
- 1 tablespoon oil
- 1 clove garlic
- ½ teaspoon Asian peppers or sriracha
- 2 chicken breasts, cut into bite size pieces
- 1 can baby corn, drained well & chopped into thirds
- 15-20 spears of medium asparagus, cleaned & chopped into thirds
- 1-2 tablespoons soy sauce
- For Sauce- see this entry from Home in High Heels
- http://www.homeinhighheels.com/2014/03/thaipeanutsaucerecipe.html
- You'll want about 2-3 tablespoons per person.
- Optional- chopped green onions & peanuts.
- Salt a large pot of water & bring to a boil. Add pasta & cook according to package instructions. Drain, rinse under cold water, & set aside.
- Add oil to wok & heat on high. When heated, dd garlic & saute until lightly browned.
- Sprinkle chicken with salt & pepper, also the dried peppers if using. Add sriracha at the end or directly to the sauce. Add chicken to the pan & cook until lightly browned.
- Add baby corn & saute for 1-2 minutes to remove moisture. Add asparagus last since it cooks faster.
- Add soy sauce & mix thoroughly then remove from heat. Add noodles & sauce mixing well.
- Serve hot or chill. Can be eaten hot or cold.
Yum! Simple, easy to make, & uses a sauce you can keep on hand. Remember to check out that recipe for Thai peanut sauce here– it beats the bottled versions! I really hope you give this recipe a try because it is an amazing fallback meal that is kid friendly as well, just omit spicy additions when you make the sauce. For more texture add some chopped peanuts on top, yum!
& here is the linkup! Hope you enjoy checking out the other recipes as much as I do! Want to join in on our next linkup? Check out my Lifestyle Blogging Network tab here for more information & how to apply.
Loading InLinkz ...Simply Tasty Thai Peanut Sauce Recipe
Have you ever had Thai peanut sauce? Bottled sauce is okay for most but the real stuff is so easy to make & tastes so much better! Later on this week I’ll have the recipe for the noodles for the Foodie Friday Linkup but for now, I bring you this magical sauce. I seem to go through peanut butter phases- one day I want it for every meal & the next it is a back-of-the-cupboard type of condiment. I’m finicky. This Thai style peanut sauce never lasts long though- I put it on everything from noodles to stir fry to chicken breasts. It makes an awesome dipping sauce as well! Keep reading to whip up your very own batch! This isn’t spot on traditional since I prefer to use my own pizazz & items in my pantry- adjust accordingly!
- 1 8-ounce can coconut milk
- ¾ cup peanut butter
- ½ cup honey or agave nectar
- ½ cup fresh lime juice
- ¼ cup soy sauce
- 1 teaspoon red pepper flakes or Asian chile
- 1 teaspoon garlic
- ½ teaspoon ginger
- In a medium pot on low add coconut milk & peanut butter. Whisk on low to combine.
- Add all remaining ingredients & cook on low until light boil constantly whisking.
- Remove from heat & serve or cool to thicken up. Can be eaten both cool & warm.
So there you have it! I’ve used both chunky & smooth peanut butter int his recipe & both work fine- I find it is personal preference. I normally use smooth & then if I want some extra crunch I can always add some rough-chopped peanuts. I usually jar this or put it in a bowl then store extra in the fridge. This sauce is perfect to recycle into a new recipe another day or night! I’ll be showing you possibly the easiest noodle recipe ever this Friday using this sauce so feel free to prep some! What are your favorite peanut based recipes? I feel like they are sadly often overlooked!
Creamy Healthy Avocado Sauce with Chicken Tacos
Happy Friday! Have you guys noticed anything new on Home in High Heels? like…say….everything? Completely new setup, I hope you guys will enjoy it! Bare with me as I’m still working out kinks including these photo sizes. Sorry! I’m hoping to have them a nice BIG size soon so you can see details!
But anyway…onto the food!If you caught my Cilantro Lime Ranch Dressing recipe awhile back then you know how much I love my little dressing mixing gadget (check out the Vibe Salad Dressing Mixer on Amazon here!) & it makes me create more recipes out of pure inspiration. Today I’m sharing my easy mix that I use on tacos, with veggies, & even thinned out as a dressing. I call it the Creamy Healthy Avocado Sauce! Keep reading to check out this simple wonder!
So this recipe was born months ago when I had half an avocado that I needed to use up. My husband doesn’t eat them & although I can sit down to a whole one I wanted to make it last. I always have these ingredients on hand with the exception of the avocado so it practically makes itself.
- ½ a ripe avocado
- ¼ to ½ cup Greek yogurt
- 1 to 2 tablespoons milk
- 1 tablespoon lime juice
- ½ a fresh or roasted jalapeno, chopped & seeded OR jalapeno sauce
- 3 pinches fresh cilantro, chopped fine
- Combine all ingredients in food processor or whisk together until creamy. Add more or less milk depending on how thin you'd like it.
- Serve chilled.
This day I was really feeling tacos & this sauce was absolutely a perfect topper! These are roasted chicken tacos on corn tortillas topped with lettuce, Creamy Avocado Sauce, & some beautiful feta cheese. Yum! Also great with chopped veggies (use it in place of ranch!) & just about anything that is good with a chilled topper in my opinion. If you need a dip cut back on the milk & add a touch more greek yogurt. Also great with a tablespoon or two of your favorite salsa.
What are your favorite sauces & dips to whip up in a flash? What do you do with leftover avocados? Link to your recipe below if you have on & check out these other sauces from the Foodie Friday Linkup members! Want to join in on our next linkup? Check out my Lifestyle Blogging Network tab here for more information & how to apply.
Loading InLinkz ...Beer Love- Sweet & Spicy Honey Beer Sauce with Chicken Recipe + St. Patrick’s Day Linkup!
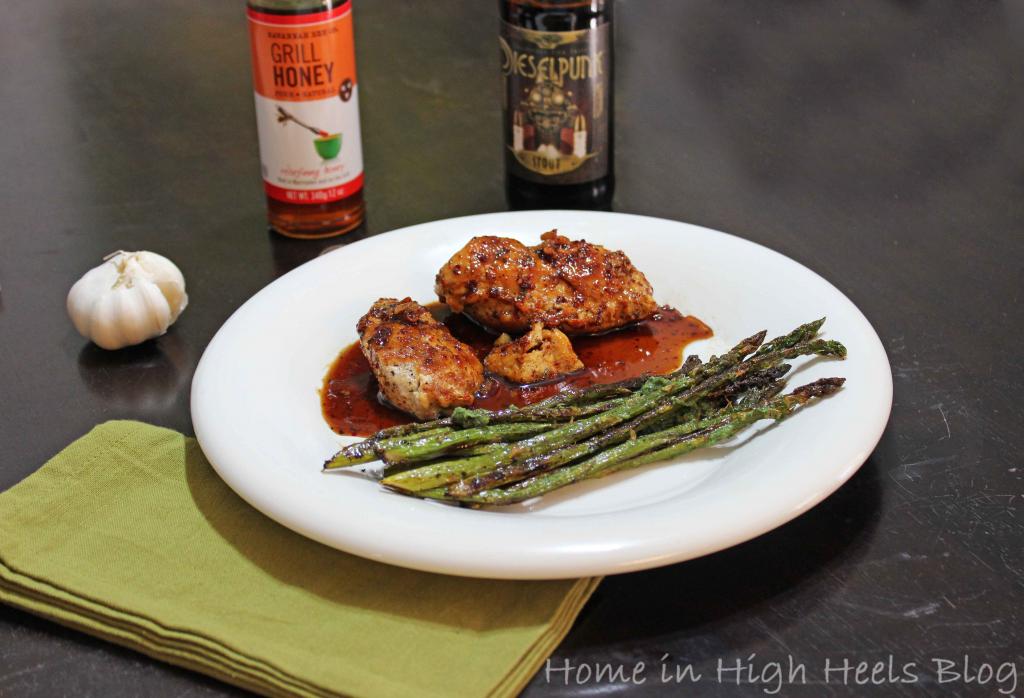
If you caught my post this past Friday with my recipe for Mint & Lime Asparagus then you saw this coming- BEER. I don’t personally drink beer very often (although my beer of choice tends to be Blue Moon & definitely with an orange wedge) but I do love cooking with it. Beer can completely transform a dish & make the meal much more exciting. Sometimes I use tequila or bourbon or whiskey but seeing as this is St. Patrick’s Day beer is only right don’t you think? I mixed together a few recipes I’ve made in the past to come up with something a bit fun & definitely tasty. Here is the end result- Sweet & Spicy Honey Beer Sauce with Chicken. Don’t forget to stay tuned till the end of the post for lots more St. Patrick’s Day ideas from other bloggers as well!
I highly recommend using a beer you really love- this one that I used was a leftover from a get-together but it worked out nicely. I also used some honey called Grilling Honey & it is from Savannah Bee Company. It has a bit more of a smoky taste but if you want something similar a nice quality liquid smoke would be lovely. I served the plate above for a lunch, for dinner I like to throw in a salad & potatoes. Husband gave it a 9 out of 10. I love how quick it was to prepare & with few ingredients, perfect on a busy night.

- 1 tablespoon canola or grapeseed oil
- 4 skinless, boneless chicken breast halves, about 6 oz each
- Fresh black pepper
- Kosher salt or smoked salt
- 2 fresh garlic cloves, minced
- ½ cup high quality beer, preferably darker & richer in flavor
- 2 tablespoons soy sauce
- 1 Japanese or Korean pepper, chopped or 1-3 teaspoons sriracha
- 2 tablespoons honey
- 2 tablespoons fresh cilantro or Thai basil
- Heat oil in large pan with high sides on medium high heat. While pan is heating up whisk together beer, soy sauce, peppers or sriracha, & honey in a small bowl. If substituting dried herbs add them now as well. Set aside.
- Season chicken breast with salt & pepper on each side & when the oil is hot, add to pan carefully. Cook about 5-7 minutes on each side for a nice sear. Don't move it around too much or you won't get a nice color. Remove from pan & keep warm.
- In the same pan with chicken leftovers add your garlic. Cook until softened & lightly browned. Re-whisk your sauce if anything has settled & add to pan. Whisk to mix. Let thicken up a bit.
- Serve hot over chicken or add chicken back to the pan to really drench them.
I hope you enjoyed this recipe inspired by the many gallons of beer guzzled on this day! If you’re not much of a drinker (I’m a lightweight to the max!) then maybe this will knock your socks off & make you feel like a St. Patrick’s Day participant! Check out the many other lovely blog posts from bloggers on St. Patrick’s Day inspiration- you’re bound to find a few new-to-you bloggers to enjoy!
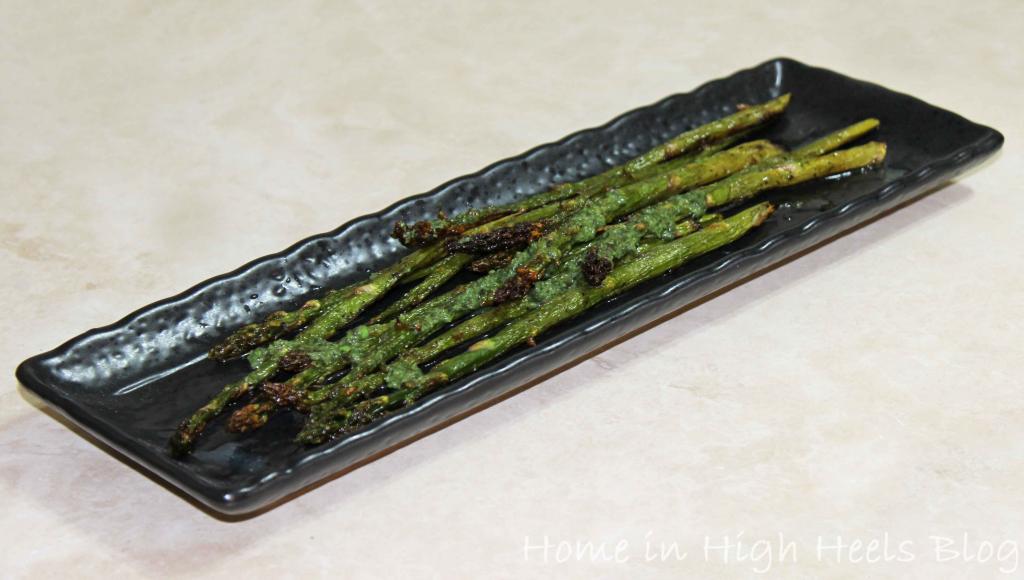
Going Green with Mint & Lime Asparagus Recipe + Foodie Friday Linkup!!
So for this Friday Foodie Linkup we went with a fun theme- going green! I think there are a lot of ways this topic can be taken, right? Healthy? Literally green? Well I hope you thought of those two as they both pertain to today’s recipe! Without further ado, here is my recipe for Mint & Lime Asparagus!

Before we go green I need to address one thing- the beautiful chicken here will have its very own post Monday for St. Patrick’s Day! How does chicken equal that particular holiday? Hint: BEER.
Now onto this recipe! I think when you’re working with really basic ingredients you should opt for higher quality so you can really taste them. I chose a higher quality olive oil, fresh cracked pepper, nice ripe limes, & a mint chutney I’ve had waiting to be used.
- 1 lb. of asparagus, washed & trimmed
- 1 to 2 tablespoons high quality olive oil for roasting/drizzling
- salt & pepper to taste
- 1 to 3 fresh limes, you want about 1.5 tablespoons of juice
- fresh mint or mint chutney
- Preheat oven to 450. Drizzle asparagus with olive oil on a roasting pan then top with sprinkling fresh pepper & salt. Make sure your spears are well covered in oil for an even cook. A good trick is to roll them with your palm lightly to make sure each is covered in oil evenly.
- Cook about 8-10 minutes until browned & the ends look a bit crisp.
- Remove from oven & transfer to serving dish. Top with fresh mint/chutney & the lime juice. toss lightly. Serve.
My Mango Whipped Dessert Recipe with my new Swirlio + Foodie Friday Linkup!
When Big Boss Kitchens offered to let me try the new Swirlio I was intrigued- make my fruit taste like ice cream you say? Why yes, yes that does peak my interest! For one thing, ice cream isn’t exactly the healthiest dessert choice. Another positive is that growing up I was lactose intolerant so sometimes ice cream just doesn’t sound good to me ya know? Plus the fact that there are only 3 steps- freeze, create, & clean! Who doesn’t want less work? I came up with a new combo (not from the recipe booklet included but you can bet we’ll be trying a whole lot of those recipes!) that uses frozen fresh mangoes & Cool Whip Free! Keep reading to check it out!
Swirlio transforms your favorite fruits into a soft serve frozen dessert in seconds! Making dessert that is delicious, nutritious and 100% guilt-free is easy as 1-2-3. Freeze your favorite fruit, let it thaw for a few minutes, then push it down the chute and voilà, dessert is both delicious and healthy is served. .
Swirlio comes with a recipe book with 50 mouth-watering recipes so you can try like Peach Melba Supreme, Pumpkin Pie and Bahama Mama. Save yourself a trip to your favorite Froyo joint with Big Boss Swirlio Frozen Fruit Dessert Maker in your home.
To create this blend I used 2 parts frozen mango to one part frozen Cool Whip Free. I always freeze my Cool Whip so that really wasn’t an issue!
Sawyer was EXTREMELY interested in my creation, I could set the bowl down! She followed me around until I finally let her see for herself. Then she tried to take it from me & we had a battle royale…but that’s a story for another time.
Not into my mix? Use bananas! I happened to be out (banana bread, nom) but they make the blend oober creamy & a lot more like ice cream or froyo. Another option you say? The recipe booklet nicely pointed out that you can make mixtures & add alcohol. A healthy margarita without any added sugar or fat? How about a mix of banana, pineapple, strawberries, & a bit of chocolate sauce for a sundae flavored…sundae? One I know we’ll be trying is peaches & cream with some fresh summer peaches- i am a peach fiend! Some other non-dessert options in the recipe guide were guacamole, white bean dip, & veggie dip!
So far, extremely happy with this unique invention. I’m already planning to use the Swirlio to make popsicles, daiquiris, & mint chocolate chip “ice cream” soon! Also, haven’t seen my husband this excited about fruit in quite a long time & we’re actually going through our freezer stock of fruit!
https://www.facebook.com/BigBossKitchenProducts
http://www.pinterest.com/bigbosskitchen
What do you think of the Swirlio idea? Have you ever used something similar? I love that it was a breeze to clean & without any blades so tiny hands can help! Don’t forget to check below for some other awesome desserts from the Friday Foodie Linkup!
Cheddar & Apples with Spiced Sausage & 5 Ingredients or Less Recipe Linkup!
So for this week in the Friday Foodie Linkup we decided to tackle a 5 Ingredients or Less recipe! I picked one we did pretty recently when we needed to use up some apples. I came up with Cheddar & Apples Spiced Sausage to make it more of a meal. Check out how easy it is to DIY & what I served on the bottom plus some variations!
First off, we tend to prefer chicken sausage for dinner recipes. Not sure why but we are usually chicken people. We’re chicken people. Ha. I’m laughing at that one, but it is true. We commonly buy ours in bulk packages from Sam’s Club because they have great flavors but you can find chicken sausage about anywhere now. I’ve found them to be lower in sodium (sometimes! read your labels!) & tend to have lots of flavor varieties like papperjack, italian, applewood, etc. They are an easy meal & often one of our favorites year round- in the winter they can go in lasagnas & during summer they hit the grill like a boss.
Cheddar & Apples with Spiced Sausage Recipe
from Home in High Heels
Sausages, about 4 depending on size. Can also be flavored (ours was pepperjack) or a different variety.
3-5 firm apples, sliced More or less depending on size, preferably Granny Smiths for tartness.
1/2 cup water or low-sodium stock
1/2 teaspoon Cajun seasoning or to taste (salt-free if you can get it)
Salt & pepper to taste
Optional topping- About 1/4 cup finely shredded cheddar cheese.
1. Coat a large skillet with cooking spray. Heat on medium & add the sausages. Cook until browned but not cooked through.
2. Add the water/stock to the skillet. Cover & cook until the water is nearly gone & sausages are firm. This usually takes 6-8 minutes depending on your sausages.
3. Coat apples in the Cajun spices & add to pan. Stir occasionally until apples are tender & flavors have mingles, about 8-10 minutes. Salt & pepper to taste.
Optionals- Top with the cheddar cheese for a bit more oomph & bite. I also like to cut up my sausage after step 2 into more manageable bites because we like our more done. Do as you wish!
We love this meal! If you’re looking to incorporate apples into dinner this is a cinch! I served this with buttered corn & potatoes this night but this combo is excellent over grits or with a nice pasta as well!
I hope you enjoyed one of our easy, quick dinners here at the Telford house! Don’t forget to check out the other bloggers participating in this linkup below!
Kicked Up Serrano Poolside Dip Recipe + Linkup!
Have you ever tried a version of the oh-so-popular Poolside Dip? Recipes for this popular dip have pretty much exploded all over Pinterest. I personally love it especially this skinnier version from Home Trends Utah here. So why am I bothering to make one? Because this is my husband’s favorite dip possibly ever. & it is a bit spicier than most other versions out there.
If table salsa is a bit spicy for you…well then this recipe will need to be altered to fit your needs. Luckily, this is pretty easy to do! Make it your own…but I think our way is tasty as heck!
Kicked Up Serrano Poolside Dip Recipe
from Home in High Heels
1 can Mexican style corn, drained
2-3 Serrano peppers, chopped fine (depending on heat tolerance, for less heat use jalapenos)
16 oz fat-free cream cheese, softened
1 packet Hidden Valley Ranch dip seasoning mix
1/4 cup chunky style salsa, drained (if you like sweet heat think mango or pineapple blend!)
1/2 cup shredded cheese (We like jalapeno or chipotle cheese but a Mexican blend or regular American works too!)
Optional- black olives, bell pepper, green chiles.
1. Start with the cream cheese in a bowl & begin wither mixing with a spatula or beating on low with a mixer. I personally like using the mixer. Next add the ranch mix, Serrano peppers, & cheese so it really mixes together.
2. Add the rest of the ingredients & mix to combine, preferably with a spatula. You’ll have something a bit dense, add a bit of the salsa undrained for something a bit thinner.
3. You can serve it as is or cover & refrigerate. If you like a lot of heat that’s the way to go. The peppers will encompass the rest of the dip & will be hotter the next day. Serve chilled.
I’d like to lie & say we eat this with something healthy like vegetables…but we honestly prefer chips. This dip is such a big hit that any time we have a get together or Ryan has a boy’s night elsewhere this is always requested. They’ll probably never taste another dip from me since I fear I’ll be set ablaze!
I’d love to hear if you make this recipe & what you change up! Also don’t forget to check out the other fabulous dip recipes from the Friday Foodie Linkup below!
Valentine’s Day Chocolate Raspberry Angel Food Mug Cake Recipe + Linkup!
Want to hear a secret? Mug cakes are my ongoing addiction. Mug brownies are gooey & mug pies are sweet but… Angel Food Cake made in a mug is just too easy to pass up. I have a big container full of half angel food cake & half devil’s food cake. Not a chocolate fan? Use another type! But this is my favorite duo personally & one choice does NEED to be angel food cake or it won’t work! Keep reading to check out my Valentine’s Day version of this easy & sweet treat!
Your basic formula for a 3-2-1 mug cake- 3 tablespoons of the mentioned cake mixture, 2 tablespoons of water, & one minute in the microwave. Then…ding! Cake! Obviously your microwave might need 45 seconds or even to add ten seconds- microwaves are weird like that. keep an eye on your cake!
When it comes out, it will look something like this spongy confection here! See how it seriously looks like a sponge? Yeah, that is quite tasty!
So what did I use for raspberry flavoring? Not fresh raspberries unfortunately…they just didn’t look good at the store. I opted for some freeze dried ones which I crushed up fine. You can use other types of flavoring but beware of making your cake dense or watery. You can also add a bit of chocolate chips if you’d like!
I added strawberries because those did look good at the store! Yum! Bonus points if you try to cut them into hearts & they come out as “abstract hearts” like mine!
What makes this even better? Sprinkles. & Valentine’s Day colored M&Ms because…why not. I guess you don’t need to add candies but yum, so good!
Valentine’s Day Chocolate Raspberry Angel Food Mug Cake Recipe
from Home in High Heels Serves 1-2
3 tablespoons half angel food cake mix & half devil’s food cake mix
2 tablespoons water
1 tablespoon crushed freeze-dried raspberries
Optional awesome decorations & strawberries
1. Add cake mix, water, & optional flavoring to microwave save mug. Stir to combine.
2. Microwave for approximately one minute watching to make sure it doesn’t over or under cook.
3. Immediately add chocolates for melty goodness or let cool.
Hope you enjoyed my little quick Valentine’s day fix! Check out some other fabulous Valentine’s Day ideas from the fabulous bloggers below! XO
Recipes: Cilantro Lime Ranch Dressing + My Favorite Dressing Container
When you really love salads & sauces, you find ways to make them a bit more interesting! My favorite way to kick up a salad fast is to create a new dressing. I love greek yogurt bases because I grew up eating ranch. It is an easy switch once you start playing around!
I also thought I’d show you my favorite salad dressing container (you can check out the Vibe Salad Dressing Mixer here on Amazon! ) which is perfect for my life. It is small enough that I don’t make too much (since I change things up a lot I try not to make things that go bad quickly in bulk) but large enough that you can really mix everything with the little stirrer. Plus, no mess! I just love it. My only complaint is that when you make creamy dressings, the spout is a little small but it doesn’t bother me. I just take off the lid. it is perfect for vinaigrette & thinner dressings though!
from Home in High Heels
1 cup loosely packed cilantro, chopped
1/2 cup plain Greek yogurt
1/4-1/3 cup olive oil depending on texture preference
3 tablespoons fresh lime juice
1/2 tablespoon white vinegar
1 garlic clove
1/8 teaspoon salt
1/8 teaspoon fresh pepper
Optional: Chipotle pepper, jalapeno, habanero pepper, fresh lemon, flavored oils.
I really like this dressing a lot & I sometimes top it with some roasted salsa. Ryan isn’t a huge fan of cilantro but he still eats it. He prefers Italian though. If you’re looking for something a bit different, I think you’ll really like this! It is my favorite with a nice bowl of tortilla soup or tacos!
Recipes: Easy Healthy Turkey Cheeseburger Meatloaf
First off: My husband loves meatloaf. Mexican style, traditional, veggies packed, etc. He just loves it. Because he’ll eat just about any version I tend to stray from the run of the mill recipes. I’m not a big fan of the beef versions either, we both like the firmness & lower calorie count of the ground turkey. If you love cheeseburgers, this will be an instant hit. The best part? You can customize it just like your burger! Keep reading for my basic recipe!

from Home in High Heels
For the mini loaves (or one big one):
20 oz lean ground turkey (or chicken/beef if you like)
1 large egg
1 slice bread (slightly damp & torn into small pieces) or crackers
1 cup cheddar cheese
1/4 cup minced mushrooms (very fine)
1 teaspoon onion powder
1/2 teaspoon seasoning salt
1/4 teaspoon pepper
For the sauce:
4 tablespoons ketchup
2 tablespoons A1 sauce
1 teaspoon Worcestershire sauce
1. Preheat oven to 350 degrees or 375 if making a large single loaf.
2. Combine all ingredients mixing well with clean hands in a bowl. Make sure to incorporate any veggies you add very well so they cool evenly. I find adding cheese last is easier so it holds some shape by the end.
3. Spray your loaf pan, muffin tins, or foil your pan then top with cooking spray. Without this step, it will stick. If you skip it, you’ll lose some of the awesome sticky cheese.
4. Divide up your turkey meatloaf mixture & top with sauce recipe, reserving half.
5. If making large single loaf, cook at 375 for about an hour checking periodically. For mini meatloaves you’ll want to cook at 350 for about 30-35 minutes. Your meatloaf should not be pink in the middle.
6. Let them rest about one minute if they are in the tins then take a knife around edge. You’ll have an amazing, crispy crust thanks to the cheese.
7. Top with remaining sauce & serve!
The best part of meatloaf is turning it into a leftover parade or creating a new favorite. This is especially great if you have kids. In my experience, most kids will eat anything covered in ketchup regardless of how many veggies you manage to stuff in. If you’d like to see a veggie packed version or something spicy, I’m happy to share! We hope you enjoy it, the sauce is my husband’s favorite! Great with the steak fries too!